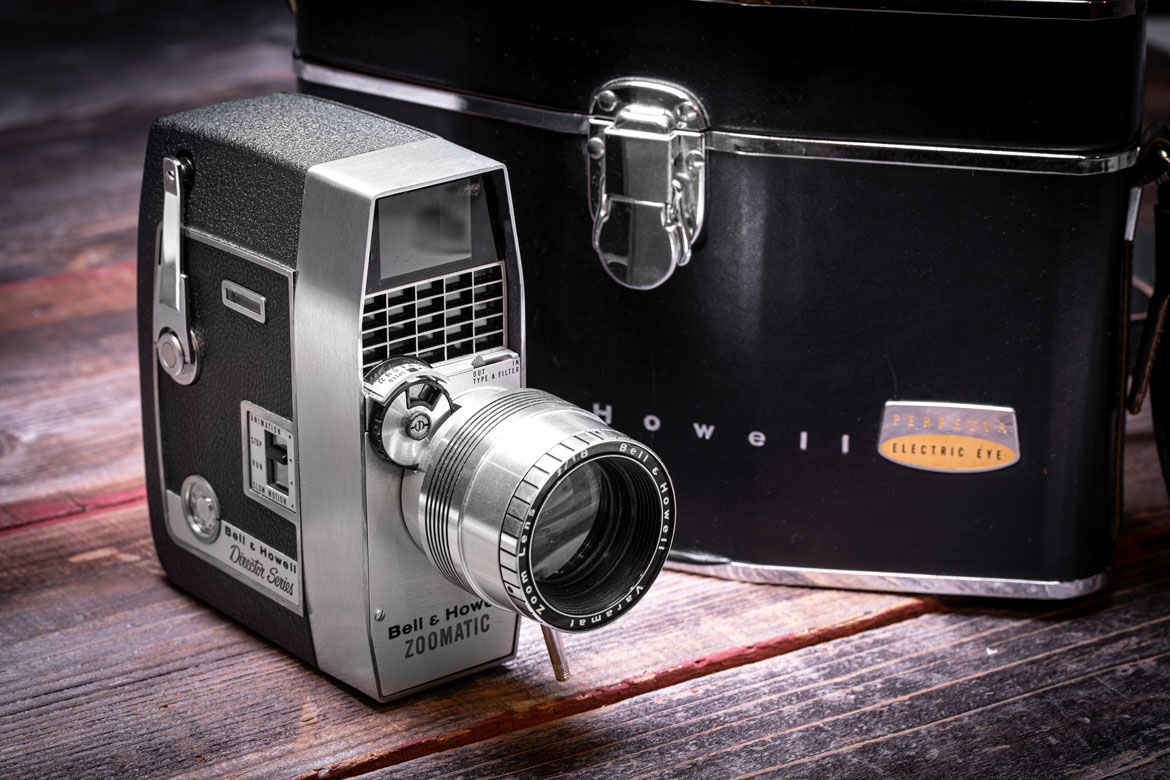
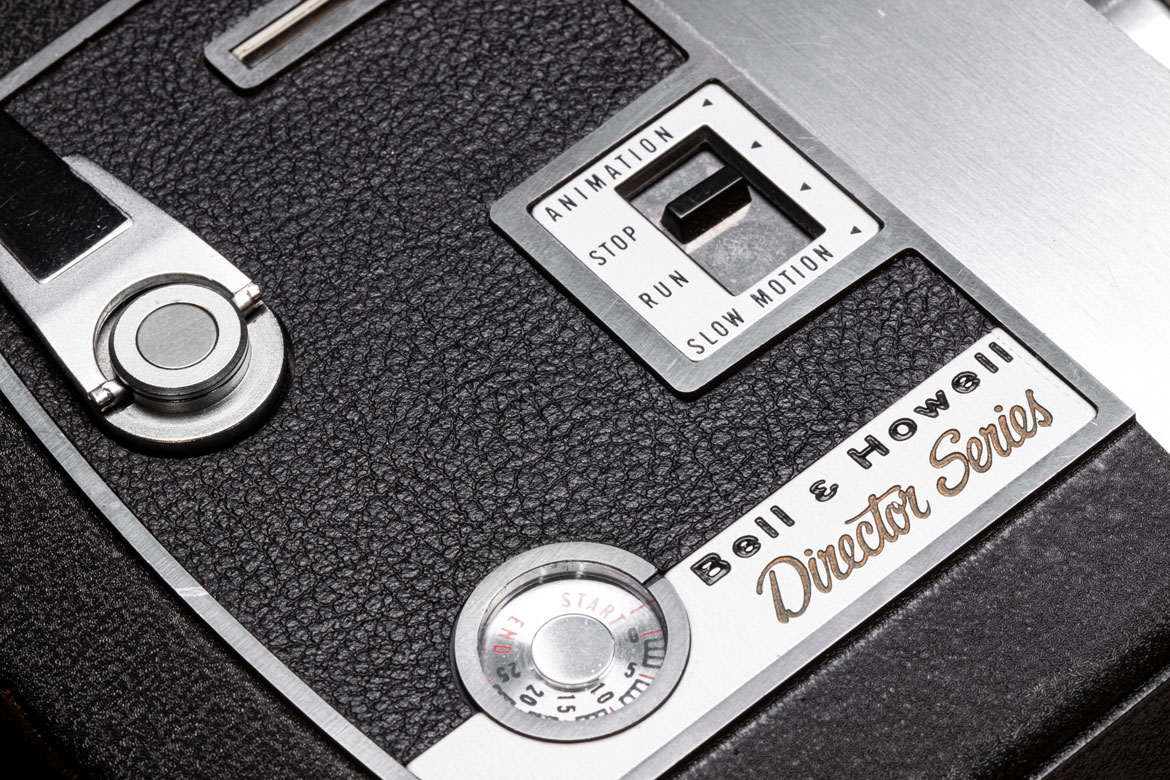
Bell & Howell 414 Review

The Future is Here

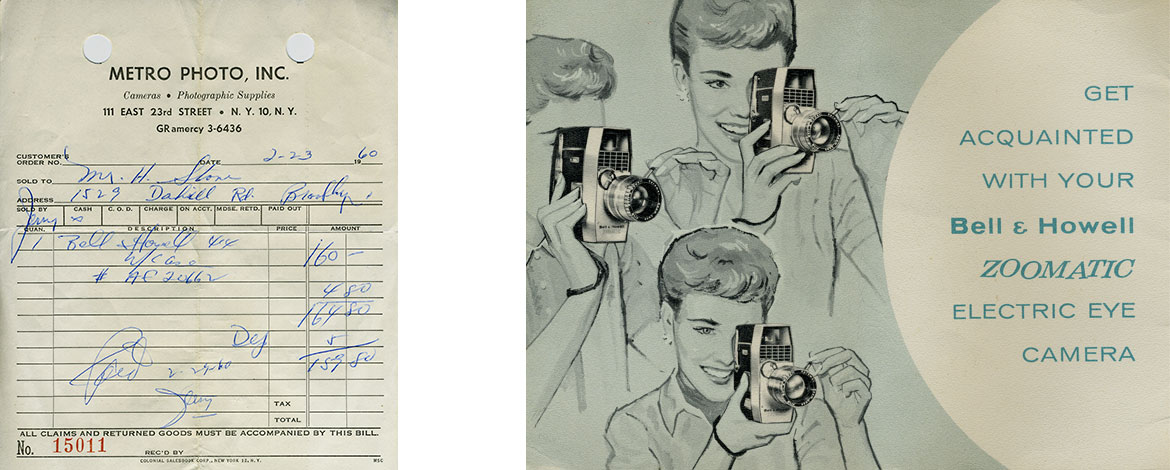
By comparison to today’s standards of advanced, high-speed, 4k+ resolution, HDR, ultra-compact, digital movie cameras, the Bell & Howell Zoomatic Director Series 414 8mm home movie camera is a behemoth relic of decades past. For most vintage movie camera collectors, the 414 makes a great conversation piece, moreover, a lethargic paperweight. However, when first introduced to the public in 1960, the 414 design was an expensive and much desired consumer-based camera, for capturing home movies on-the-go. For the Cold War nuclear family, with discretionary income, the 414 was a wise investment, for preserving memorable family experiences, for the future to come.

So, let’s go ahead and overload that Ford Galaxie Country Squire station wagon, sending the rear bumper to the asphalt while raising the headlights to the stars, with waxed canvas pup tents, army surplus sleeping bags, the all-steel outdoor kitchen, a Coleman galvanized metal ice chest, plenty of Coppertone suntan lotion, Off! insect repellent, tiki torches, the family dog, both kids (optional) and head out on the road, to shoot a home movie, for an adventure of a lifetime.


If unsure how to securely tie down the aluminum canoe to the station wagon’s roof, using the proper Boy Scout knot, do what everyone does…tie a redundancy of elementary knots and bring a Buck Knife, to cut it free once at camp.


What's in the Box?


I recently purchased my Bell & Howell 414 for less than the cost of shipping, with little expectation that it might actually still work. My thought was for display purposes only. I had not even considered if fresh stock 8mm film was even available, let alone options for development and digital scanning. The camera actually came with the original receipt from Metro Photo, in New York City. In 1960, the 414 sold for $160.00. Adjusted for accumulative cost of inflation, the 414 would sell today, for $1,535.00.

Once arrived and the proverbial “How does this thing work?” tinkering session passed, I quickly determined that it may, in fact, be capable of capturing moving pictures, after a half-century of dormancy. Because of its purely mechanical, spring-wound, robust all-metal design, why wouldn’t it still work? And let’s not forget where it was made – in the U.S.A. For comparison, do you think your fancy Apple watch will still work in the year 2082? Answer: Nope!


Sourcing Double 8 Film Today


After reading through the Bell & Howell 414’s operating manual and accepting that the camera was no longer under the manufacturer's one-year guarantee, to be “free from imperfections in both material and workmanship…”, I decided to source some 8mm film online. My search results took me to the Film Photography Project website – a very cool group of film lover aficionados who had just what I needed. I decided to roll with a classic look and purchased their Cine 8 40 ISO black & white transparency film. Yes, transparency film. Professional movie cameras back in the day ran negative film stock. Once developed, a fine-grain intermediate positive was produced from the original negative, for editing and duplicating print release purposes. Knowing consumers were not going to go through this lengthy and costly process, they made 8mm positive transparency film, so the same film used in the camera could simply be developed and projected in the family’s living room. For “Project Death Valley”, I specifically went with black & white film rather than color. Yes, it’s easy to strip the color out of color film, but I was looking for authenticity

8mm film comes in a variety of options, so it’s important to know what your specific camera uses. The Bell & Howell 414 takes Double 8 film. What’s that? Double 8 is actually 16mm film cut at twenty-five-feet, then preloaded on a spool. Properly loaded, one-half of the film’s width is exposed when you run the first twenty-five feet through. The take-up spool is then removed from the lower camera spindle, flipped, reloaded back to the upper spindle and the other half is run through. After the development process, the film is split right down the middle and spliced together, giving you fifty feet of continuous film to project against your Da-Lite screen. Really smart considering the era in which it was designed. So, you might be asking why not just order 16mm film? The answer is because Double 8 film is specially perforated, cut at twenty-five feet and placed on a proprietary, center registered, spool that prevents it from being loaded incorrectly inside movie camera. Other 8mm home movie camera models ran Double 8 magazines, high capacity one-hundred-foot spools and then the Cadillac of all home movie films, the cat’s meow – Super 8 film.

From today’s perspective, where we simply tap on the video icon of our smartphones, allowing our device’s autonomous intelligence to make decisions on its own, the 414 was a somewhat complex movie camera to learn. You had to have some basic photography knowledge, to fully understand how the camera worked.


Basic Operation of The Bell & Howell 414


Hand-Cranked Home Movie Camera

To begin, the Bell & Howell 414 does not operate on batteries, so it needs to be hand-cranked, which creates internal spring tension, for reciprocating power. The optional 414P model, with Power Zoom, also uses the tensioned springs to drive the lens’ zoom function, from the two momentary button controls on the top of the camera – brilliant!


When out camping in the middle of nowhere and your friends bust out their clever, solar powered smartphone chargers, laugh away while hand-cranking your 414 camera.


Loading the Film

Loading film is a bit tricky at first, but once you learn the pathway it’s a no-brainer. The hardest part, I found, was threading the film leader into the center of the take-up spool. To be fair, I was using a film changing bag, wanting to maximize as much unexposed film as possible. The operating manual instructs you to do this in low-light, but I wanted to see if I could get an extra foot or two, which I did.


Film Speeds (ISO)

When originally introduced, ISO film speeds were available between the 10 to 40 range. Why so low and slow? Consider a few factors for this decision.

First, the actual matted (projected) frame size of 8mm is extremely tiny (3.7mm x 4.9mm), so when projected on a screen, from let’s say 15 feet away, film grain size will have an impact on the image quality when enlarged. For this reason alone, the benefit of a low ISO film is understood.

Second, the normal “RUN” speed for the Bell & Howell 414 is fixed at 16 frames per second, running a 180-degree shutter angle and a 1/35 second shutter. At 1/35 shutter, coupled with the relatively fast Varamat ƒ/1.8 lens, a low ISO film works out nicely. ISO 400 film is available, but the only way to use it outdoors would be by taping a 3-stop neutral density filter to the front of the lens; the fixed lens is not threaded to accept filters. Using ISO 400 film indoors is fine, but be sure to read the light and set the 414’s aperture manually – you will need to trick the camera.


Film Types and Built-In Filters

For those of you who remember having to choose between Daylight or Indoor (Type A 3400K) color temperature film there’s really only one option available today – Daylight. The Bell & Howell 414 has a built-in “Type A” filter which should be placed in the “out” position when exposing Daylight balanced film. It was purposeful back in the days when exposing Indoor film, balanced for Tungsten lights, outdoors. When exposing black & white film, the filter servers little to no purpose. If you are old-school and remember placing Color Temperature Orange gel (CTO) over 5600k photofloods, or Color Temperature Blue gel (CTB) over 3400K photofloods, to correct for the film type loaded, the filter performs this reciprocal function internally.


Frames Per Second Selections

The highly advanced frames per second function of the Bell & Howell 414 allows users to choose between the normal “RUN” speed of 16 frames per second, a “SLOW MOTION” speed of 48 frames per second and “ANNIMATION” mode, which allows single still frames. Why single stills? So, your kids can make their own Play-Doh claymation movie: “Gumby and Poke Battle Davey and Goliath for the Universe”. Even more thoughtful, the user can, on the fly, roll at 16 frames per second, while their teenage high school star wide-receiver is bolting towards the end zone, and instantly switch to 48 frames per second for the game-winning touchdown catch. That would have been helpful for the “Oh, my nose!” Marcia Brady moment.


Universal Focus Lock

This may sound like auto-focus, but it’s based on the elementary photography rule of depth-of-field. Depth of Field (DOF) is the area between the nearest point in focus, to the furthest distant point in focus. DOF is controlled by the lens’ aperture, or iris. Ever wonder why your eyes squint to bring things into focus? By reducing the amount light entering your eye, via the iris, your eyes are able to see clearer, because the DOF has increased. The wider the aperture, the shallower the DOF. The inverse is true – the narrower the aperture, the deeper the DOF.

By understanding the Sunny 16 rule, if you are filming outdoors under full sunshine the camera will automatically select a narrow aperture, likely ƒ/16 or ƒ/22, so by setting Focus Lock at its predetermined focus distance of approximately twenty-two feet, you will obtain ample DOF. For closeups, it’s recommended to come off the Focus Lock, estimate your subject’s distance and apply manual focus.


Fully Automatic Electronic Eye Operation

The Bell & Howell 414 is equipped with a built-in light sensitive Selenium photocell which averages the entire scene’s light and automatically controls the lens’ aperture for proper exposure. Selenium cells can last for decades, if they are not subjected to a constant light source. If you buy a 414, be sure to ask how it was stored. A camera that has been stored for decades on a shelf is likely to have a burned-out cell, as years of continuous ambient light may have affected it. A smart move is to buy one that comes with the original travel case. In theory, this would indicate that it was protected over time from light. However, do not fret if your 414 has a dead cell…you just have to read the light, use an old fashion light meter, or download a free light meter app for your smartphone. Manually setting your camera will actually provide more accurate exposures. Now you’re a bona fide Director of Photography!


For more information and to download the Bell & Howell Zoomatic Director Series 414 Operating Manual, see link below.


Bell & Howell Zoomatic Director Series 414 Operating Manual PDF Download


First Test Roll (Post Hiatus)


Well, my friends and I couldn’t get the old Country Squire running (something to do with the carburetor), so we decided to play it safe with our modern-day, computer-controlled, multi-port fuel injected wagons, ultra-light camping gear, Yeti coolers, satellite communications equipment, SPF 72 sunscreen, LED lamps and headed for the backcountry of Death Valley, CA, to fix that ol' outhouse wooden door and a time-honored visit at U2’s fallen Joshua Tree. To make the Bell & Howell 414 feel not-so-lonely, we did slightly weigh down the rear bumper by loading our Lodge cast iron Dutch oven. At least now, the 414 and pot could converse about the good old days.

Although I had the film developed & scanned by FPP and knew I could easily edit the short vignettes in Adobe Premier, iMovie or other, I wanted to be an originalist and force us to think the timeline through; being mindful of the places we wanted to capture, calculating the amount film remaining and leaving just enough footage for the final scenes at The Joshua Tree.

I am happy to report my expectations were GREATLY surpassed: grainy, dust everywhere, variable contrast & density issues, fluctuating exposures, vertical lines etched into the film’s emulsion via the pressure plate, light leak transmissions from the sprocket holes…everything you could hope for, from a sixty-year-old home movie camera. I would not change a thing!


Video Below
Project: Death Valley 8mm Video Transfer

480p Default: Select the GEAR icon to adjust the resolution.


Update 1: Cine 8 Color Negative Film ISO 40 (Rollei 400 ISO Infrared Film Stills)

150 Miles South, Into the Heart of the Mojave Preserve


As a follow up to the previous review, I wanted to give Film Photography Project’s Cine 8 Color Negative ISO 40 film a test, along with a thorough cleaning of the 414. The subject this time: Springtime in the Mojave Preserve.

Unfortunately, the 414 was designed using cost saving techniques, which does not allow the lens to be removed easily. Yes, it can be removed, but there’s no quick-release screw or bayonet mount, for this procedure. The camera would need to be carefully disassembled on a workbench and with fingers crossed, hoping the small springs and tiny parts will find their way home safely. Summary: don’t do it. Just get in the film gate the best you can, with lint-free tissue, and an appropriate cleaning solution.

The end results were quite the contrast from the black & white film. Which is better? Neither, they’re both unique to themselves. For juxtaposition, I also shot a roll of Rollei Infrared on my Leica M2 and peppered the stills into the final edit.


Video Below
Project: Mojave Preserve 8mm Film - Old School Techniques

480p Default: Select the GEAR icon to adjust the resolution.


Update 2: Road Trip '68

Las Vegas to Joshua Tree National Park via Route 66


This spring, I wanted to film another little vignette set against my favorite natural canvas, the Mojave Desert.

My friends, who recently completed their multi-year, labor of love project of restoring a vintage 1968 Camaro, wanted to immortalize its re-christening with a good old-fashioned 8mm home movie – the way it was done when the car originally drove away from the dealership back in '68.

The idea, a classic desert road trip, capturing roadways, roadside attractions and epic vistas, as they organically rolled out before us. The entire short was filmed over a quick two-day trip starting in Las Vegas, traveling to Joshua Tree National Park via Route 66 then returning home. For overnight accommodations, we threw tents under the stars on unimproved desert acreage, in Wonder Valley, on the outskirts of Twentynine Palms, California. For the various stops along the way, I chose locations that were mid-century relics and was careful not to capture any modern vehicles in the background. With good fortune, a box of Good & Plenty, a 1968 Life Magazine and a few vintage rides appearing along the way, we winged it.


About the Edit:

I purchased two reels of Cine 8 Color 40 from the Film Photography Project knowing I would have roughly 8 minutes of film once developed. For the black and white stills, I went with Kodak T-Max 3200 using a 3 stop ND filter on my Leica M glass. Why a high-speed film when photographing outdoors under full sunshine? Simple, I wanted natural continuity between the high-grain 35mm stills and the 8mm film stock.

On our first gas station stop, where I shot my first takes, I briefly placed the Bell & Howell 414 on the ground, to capture the opening black & white “GAS” image with my Leica M2. Unbeknownst to me, the film compartment door on the movie camera unlatched itself allowing the sunlight to immediately strike the first reel of film. Yeah, I was super frustrated for not checking that door more closely. (Did I ruin the first reel?) I decided to hand-rewind the first reel and place the second reel in the movie camera, leaving the first reel for my pickup, or b-roll shots. (Who am I kidding? All 8mm film is b-roll.) When I later loaded the backup reel, I knew there might be some overexposure, especially on the outer edge of the film and possibly some double exposure. To my surprise after developing, my mistake was truly serendipitous… really helping the movie look like it was found in an old box, from the family attic. The overexposed edges and double-exposed sections played right into my hands!

Once in editing, I found myself with well over a hundred short-takes. Some of them were linear in time, with respect the order on the film, but not all. The double exposed section was only twenty-seconds long, but what to do with it? “Cutting room floor.”, as they say? Again, this played perfectly as my fin du récapitulatif, or the movie’s denouement. (Super pretentious and annoying choice of words, I know.)


Friends have asked:

“Why the vintage 8mm projector’s sound rather than scoring it with music of choice?”

Simple, I want to respect the copyrights of others. For my personal edits, I have these movies perfectly scored with quintessential country and desert themed songs, which brings an entirely new dimension to viewing.


“Why am I seeing the 8mm film’s perforation holes on the left side of the frame?”

8mm film was designed for home projection, where the projector guides the celluloid through a pressure plate, or film gate. The film gate mattes that portion of the exposed film delivering a square-like image on the screen. The information on the left edge was never intended to be seen. Note the occasional image curvature between the perforation holes? That’s the edge of the lens optic, hence the word “scope” - often used in cinematography jargon. Additionally, you'll see that curved edge flex, or "breath". That's the result of the zoom function; the lens elements are moving back and forth.


“The occational orange flaring on the left side of the film. What's causing that?”

As previoulsy mentioned, the film was briefly exposed to the sun, which burned the reel's edge. You're seeing the effects of the burn, or overexposure, as sunlight bled into the film. Modern day phone apps can reproduce this, as a pseudo after-effect. This was purely by accident, symtomatic and reminiscent of many homemade movies of days past.


Shout out to Gram Parsons, for those with sharp little eyes.


Video Below
Project: Road Trip '68 via Route 66 (1968 Chevrolet Camaro Restoration)

480p Default: Select the GEAR icon to adjust the resolution.